Crop a Screenshot to Remove Edges, Tabs and Clutter
To crop a screenshot cleanly, cut away the taskbar, menu bar, browser tabs and any notifications, and keep only the window or panel the reader needs, saved as PNG so text stays sharp. That one step makes bug reports faster to triage, help articles easier to follow and shared images safer. A full-screen capture on a modern laptop is often 2880 x 1800 pixels or larger, and most of it is irrelevant. This guide is for support agents, technical writers, QA testers and anyone who pastes screenshots into Slack, Jira or email.
✂️ Try Crop Image now — freeOpen →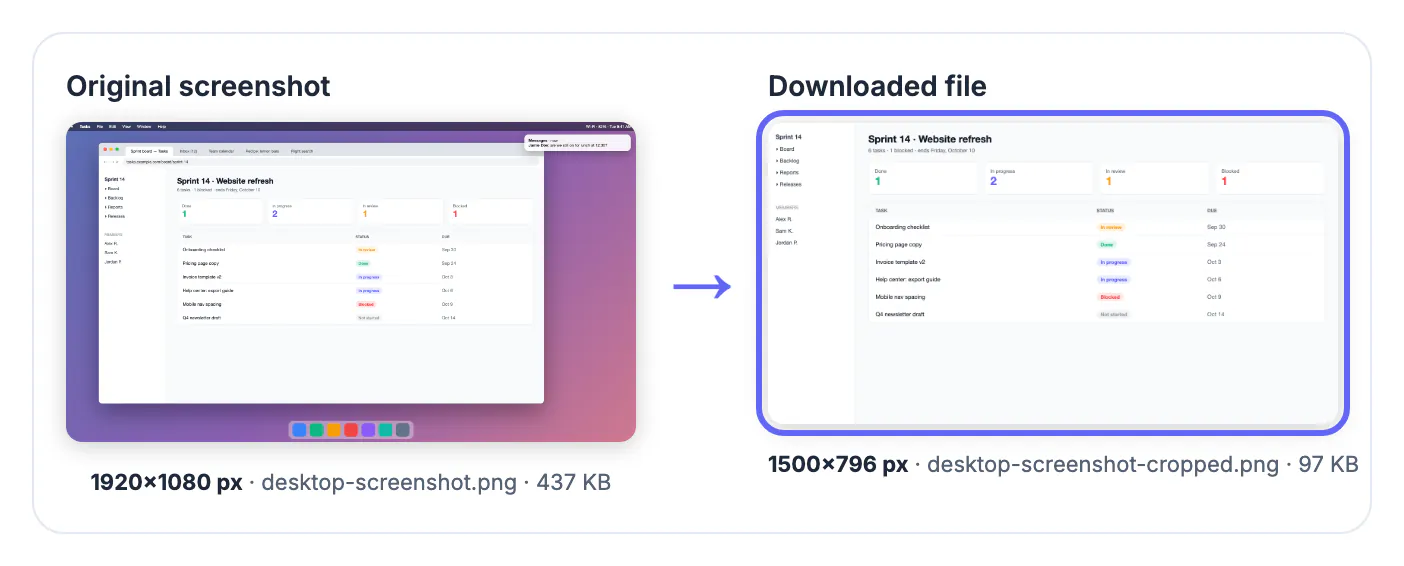
A full-screen capture shows everything: your open tabs, a bookmarks bar, an unrelated chat preview, the clock, sometimes a customer's email address in another window. Readers have to hunt for the one button you meant, and anything private in the frame now lives in a ticket system that dozens of people can open. There is also a technical trap. In 2023 researchers disclosed a flaw nicknamed aCropalypse: the Markup editor on Google Pixel phones and the Windows Snipping Tool could save a cropped screenshot while leaving the original, uncropped data at the end of the file, where it could be recovered. Both were patched, but it is a good reminder that a crop should produce a fresh file. Crop Image redraws the selected area onto a new canvas and saves that, so the removed area is not carried along. Clean captures also save time for whoever reads them. Support teams often estimate that a well-cropped screenshot with the exact error visible cuts the back-and-forth on a ticket, because the engineer does not have to ask which page, which button or which message. Technical writers see the same effect in documentation: readers follow steps faster when each image shows only the panel being described.
What to cut from a screenshot, top to bottom
Standard interface bars have fairly predictable sizes, which makes the first pass quick. On high-density screens, double the numbers.
- macOS menu bar: about 24 points, roughly 48 to 74 pixels on a Retina display depending on the notch
- Windows 11 taskbar: 48 pixels at 100 percent scaling, 72 at 150 percent
- Browser tabs, address bar and bookmarks: often 80 to 130 pixels at the top
- Phone status bar with time, signal and battery: roughly 100 to 180 pixels on current phones
- Notification banners, chat previews and desktop icons wherever they appear
When the browser address bar holds the URL the reader needs, keep it and cut the tabs above it.
Privacy checklist before you share
Cropping is the simplest redaction because the pixels are gone, not just covered. Scan the frame for anything that does not belong in the recipient's inbox.
- Names, email addresses and phone numbers of customers or coworkers
- Other open tabs that reveal clients, projects or personal accounts
- Account balances, order numbers and API keys in developer consoles
- Calendar pop-ups and message previews in the corner of the screen
- Anything inside the kept area that still needs hiding should be blurred or boxed in a separate editor
Crop Image also saves a new file without the original's embedded metadata, which removes capture details some tools store.
If something sensitive is visible, this guide to hiding personal info shows how to cover it before you share.
Keeping text readable in docs and tickets
Screenshots are mostly text and sharp lines, which suffer under the wrong format or heavy resizing.
- Save as PNG; JPG compression smears text and draws halos around thin lines
- Do not downscale a Retina capture by an odd factor like 70 percent; halve it or keep it
- For knowledge-base articles, a consistent width of about 1200 to 1600 pixels keeps pages tidy
- Leave a little context, such as the panel title, so readers know where they are in the app
- For a before and after pair, use the same crop box size for both
Type exact width and height in the crop tool to reuse identical dimensions across a whole set of help article images.
Crop recipes for common jobs
Different readers need different amounts of context. Match the crop to the job.
- Bug report: the error message plus the control that triggered it, with the URL if it is a web app
- Step-by-step guide: the relevant panel only, one screenshot per step
- Social post or slide: a tight crop around the feature, then add framing in Screenshot Beautifier
- Receipt or confirmation: the order details only, with card digits and address cut out
- Phone capture for a teammate: remove the status bar and keyboard, keep the app content
If you need the words themselves rather than the picture, run the crop through a text extractor instead of retyping it.
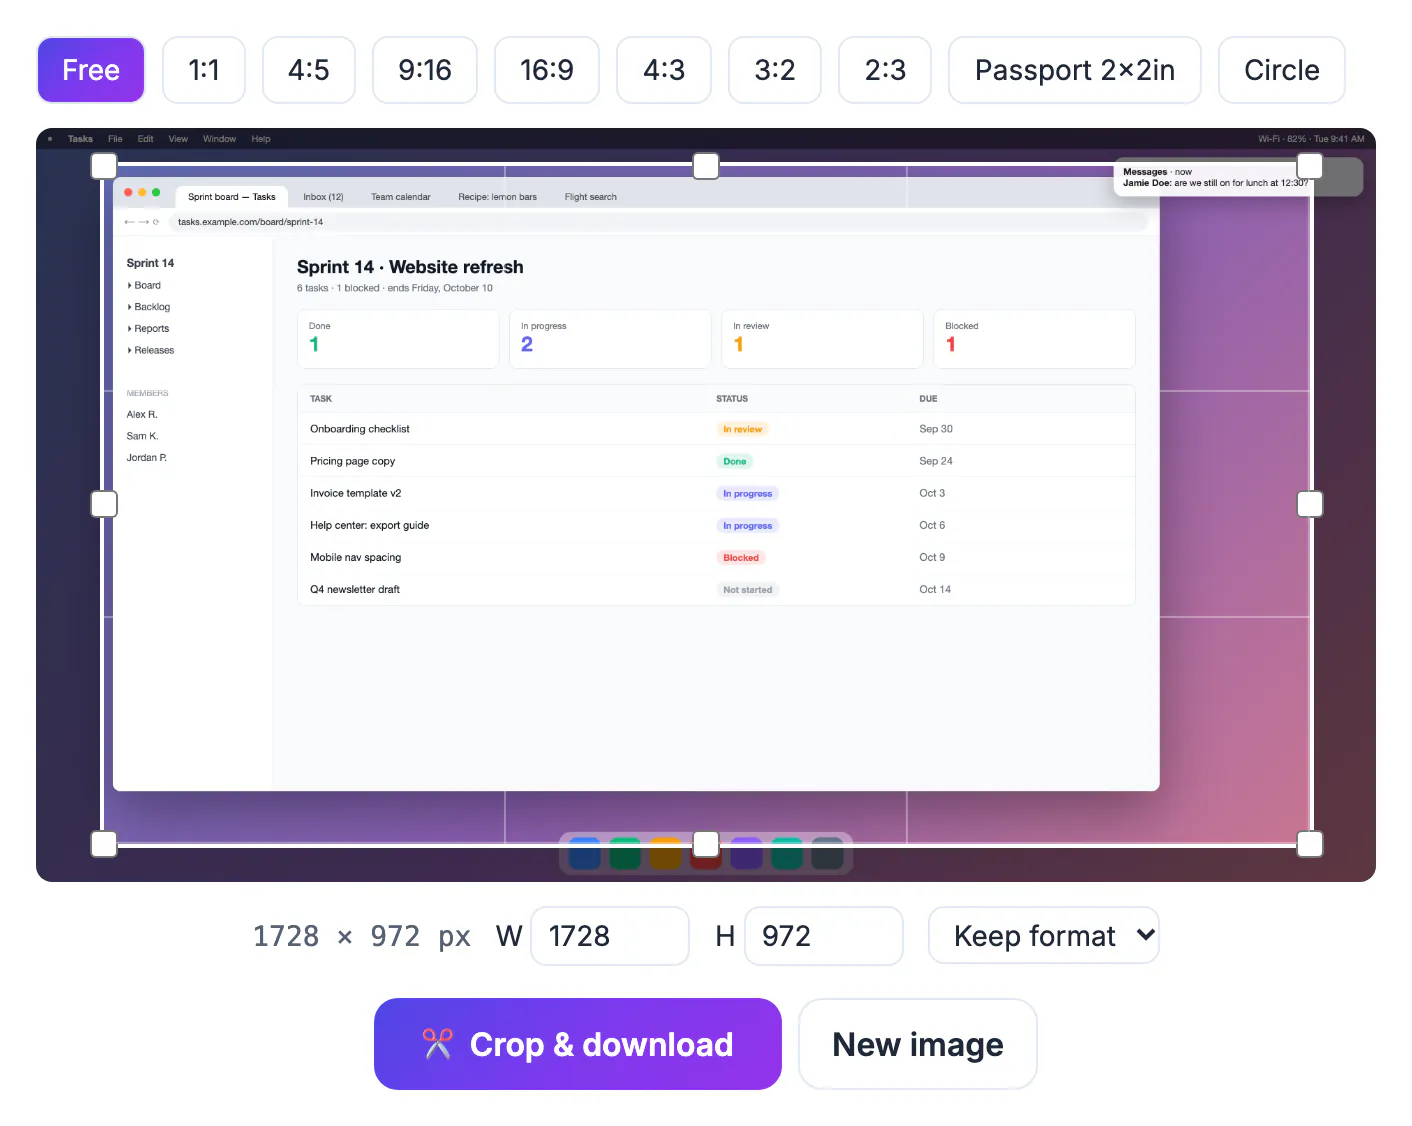
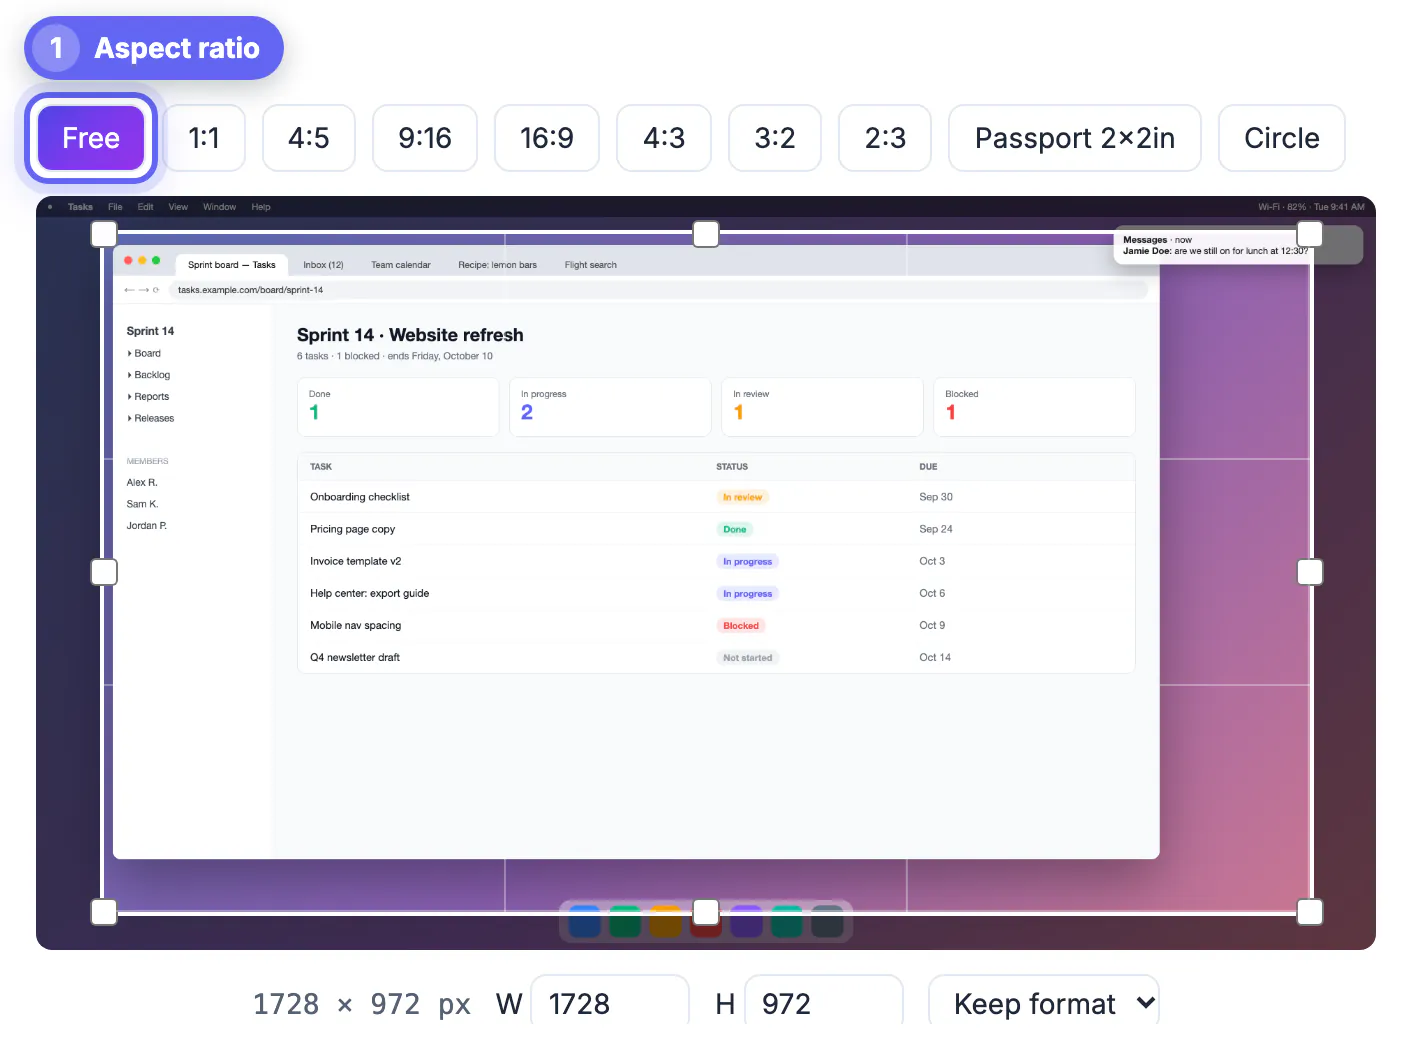
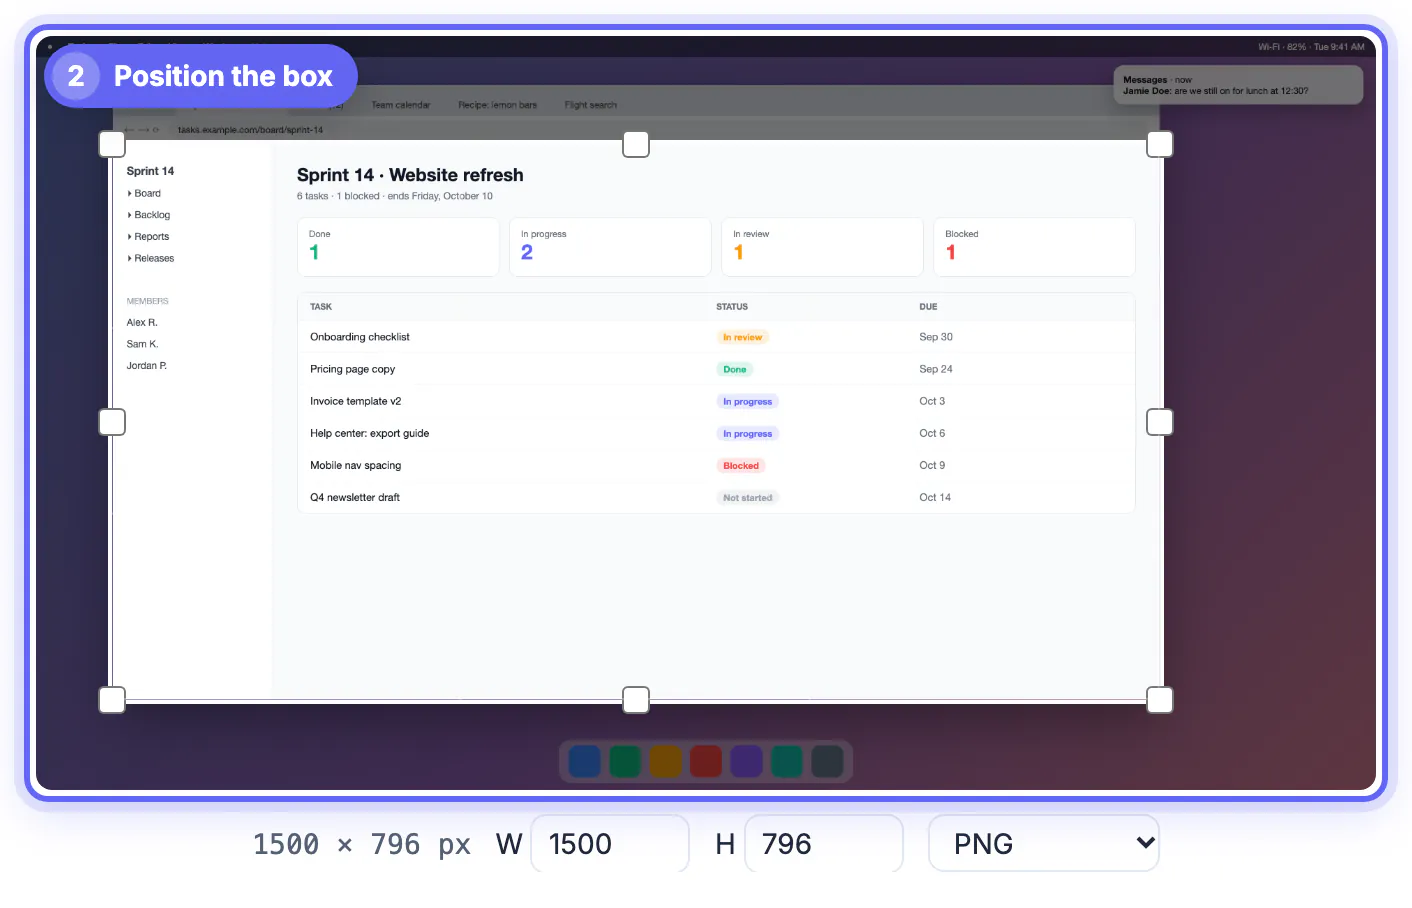
Step-by-step

Common mistakes to avoid
Pro tips
Frequently asked questions
How do I crop a screenshot on a laptop without special software?
Open Crop Image in any browser, drop the screenshot in, drag the box around the part you need and download it. On Windows, press Win plus Shift plus S; on a Mac, Command plus Shift plus 4 captures a region directly.
Can cropped areas of a screenshot be recovered?
Not from a file that was redrawn from scratch. The aCropalypse flaw affected specific older editors; Crop Image writes a new image containing only the kept area. Update any phone or laptop editor you still use, since older builds were the ones affected.
Should screenshots be PNG or JPG?
PNG for anything with text, code or interface elements. JPG is fine only for photo-like screenshots such as a video frame. WebP also keeps text sharp and produces smaller files for web publishing.
Why is my Mac screenshot so large?
Retina displays capture at twice the point size, so a 1440 x 900 screen becomes 2880 x 1800 pixels. Cropping to the relevant area shrinks it. Halving a Retina capture to 1440 x 900 keeps text crisp while reducing file weight.
Is my screenshot uploaded anywhere?
No. The crop is processed in your browser tab, which matters when captures contain internal or customer data. That makes it suitable for internal tools, dashboards and support queues with confidential details.
Crop screenshots down to the window or panel that matters, cut taskbars, tabs and notifications, check for private details, and save as PNG. A clean crop makes tickets and docs faster to read and safer to share.
Related guides
Browse more: all image guides · Crop Image