How to Remove Silence From Audio Automatically
To remove silence from audio automatically, load the recording into a silence remover, let it mark every quiet stretch below a loudness threshold, check the marked parts on the waveform, and export the file with those parts cut out. The three settings that matter are the threshold (how quiet counts as silence), the minimum silence (how long a pause must be before it is cut) and padding (how much quiet to keep around each word). Here is how to set them for podcasts, lectures and voice memos without making speech sound rushed.
🤫 Try Remove Silence now — freeOpen →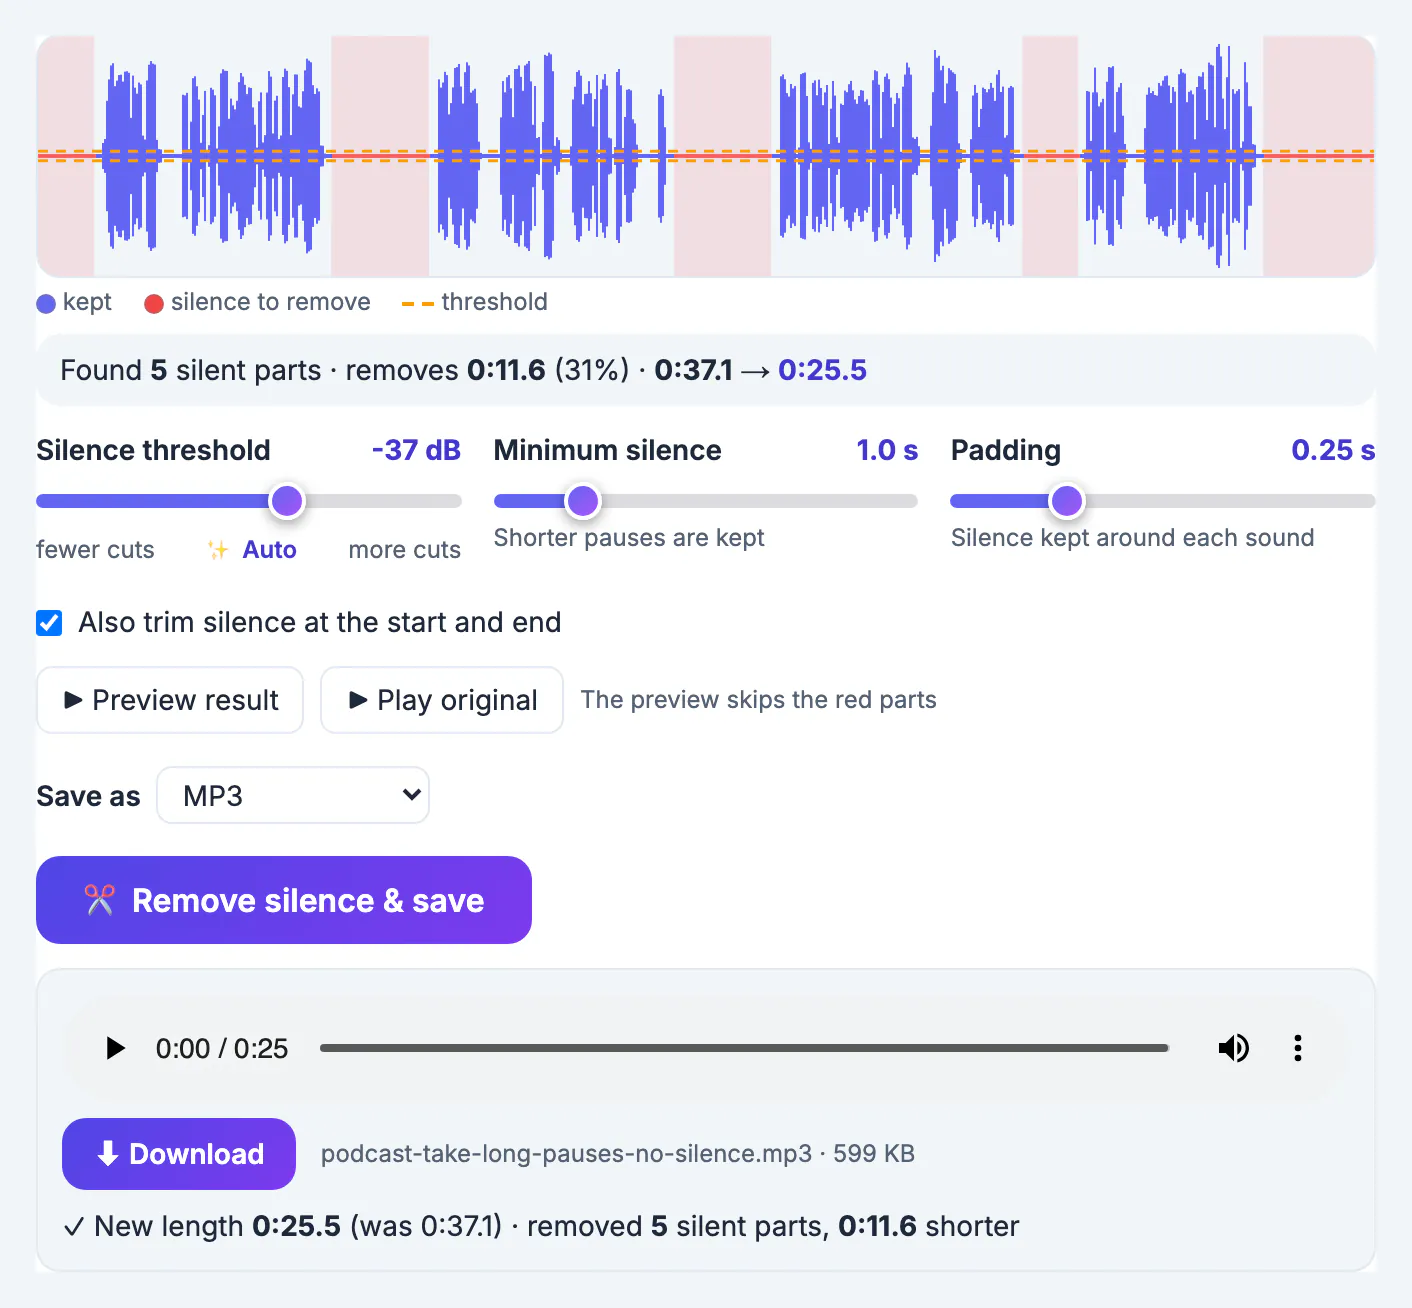
Long pauses are normal while recording: you check notes, wait for a guest, or restart a sentence. Played back, they feel like the file froze, and listeners skip ahead or leave. Removing them by hand means scrubbing a timeline and making dozens of cuts. An automatic tool measures the loudness of the whole file in a second and applies every cut consistently, so you only review the result.
How automatic silence detection works
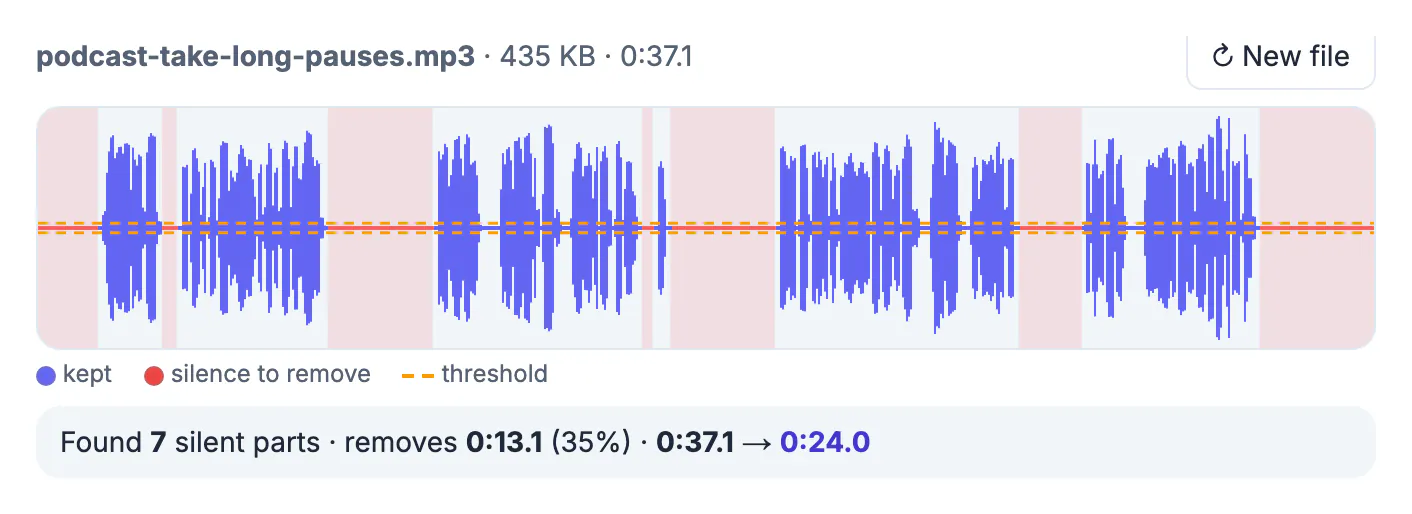
The tool reads the loudness of the recording in small slices and compares each one with the threshold, measured in decibels (dB). Anything quieter than the threshold for longer than the minimum silence is marked for removal. On the GrabCast Remove Silence page those parts are shaded red on the waveform, and a dashed line shows the threshold.
Silence is rarely true digital zero. Room tone, a fan or microphone hiss sits somewhere around -60 to -40 dB, so the threshold has to sit just above that background level. The Auto button sets it from the recording's own background level, which is the best starting point.
The three settings, and good starting values
- Silence threshold: the default is -40 dB. Move it toward more cuts if pauses with light background noise are missed, or toward fewer cuts if soft word endings get marked.
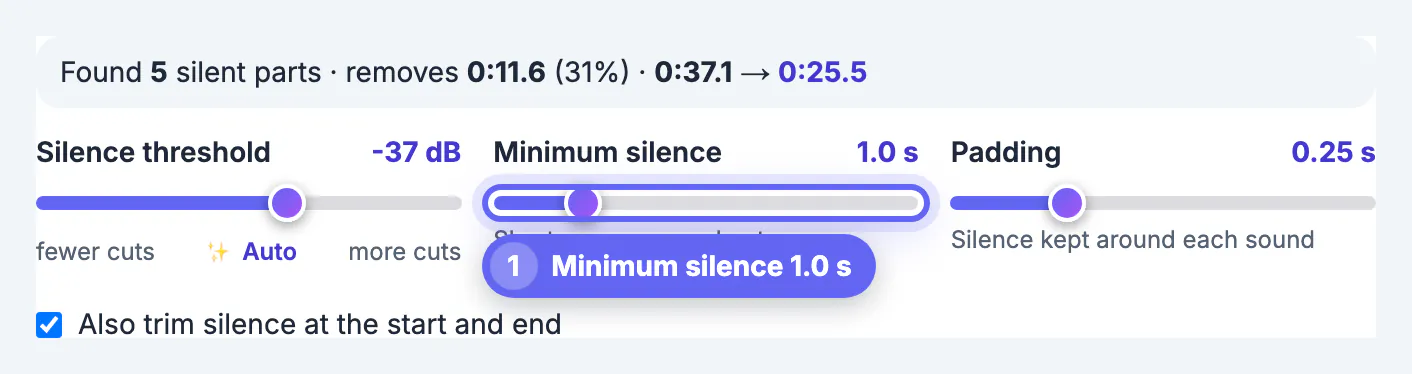
- Minimum silence: 0.6 s by default. For conversation, 0.8 to 1.2 s keeps natural breaths and only removes real dead air. For a tutorial or voice memo you can go lower.
- Padding: 0.15 s by default. This is the quiet kept before and after each sound, so words do not start or stop abruptly. Raise it to 0.25 s if the result sounds clipped.
- Also trim silence at the start and end: on by default, which removes the wait before you start talking and after you stop.
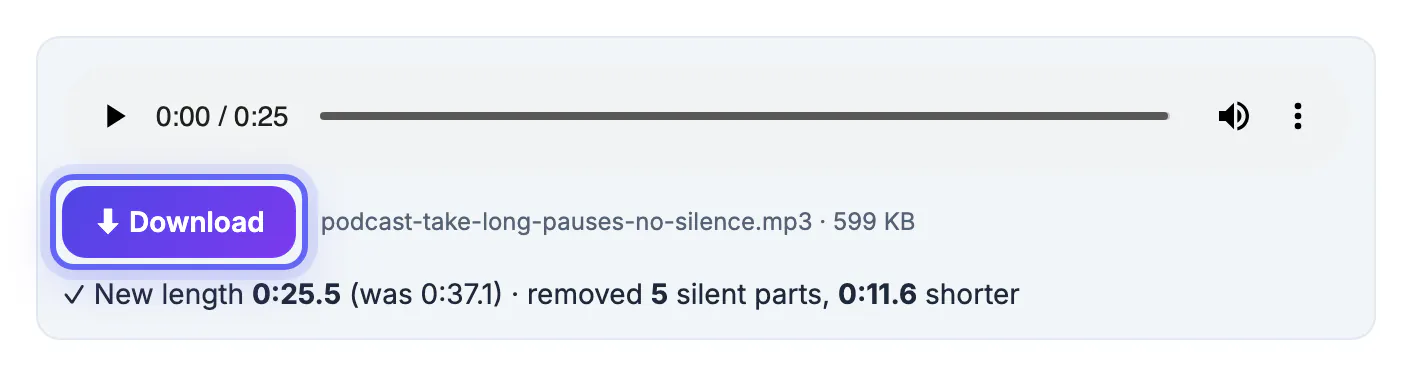
In the example screenshots a 37-second podcast take goes from 7 cuts at the default 0.6 s to 5 cuts at 1.0 s, which keeps short pauses between sentences while still removing 11.6 seconds.
Podcasts, lectures and voice memos need different cuts
Interviews and podcasts: keep the minimum silence around a second. Conversation needs some air, and cutting every short gap makes guests sound as if they interrupt each other.
Lectures and screen recordings: long gaps while you write on a board or wait for a page to load can go. A minimum of 1.5 to 2 s removes them and keeps the rhythm of speech.
Voice memos and notes to yourself: you only care about content, so a short minimum silence and small padding give the shortest file.
The tool also accepts video. It re-encodes MP4 so every cut stays in sync with the picture, which is slower than an audio export on long clips.
Check the cuts before you export
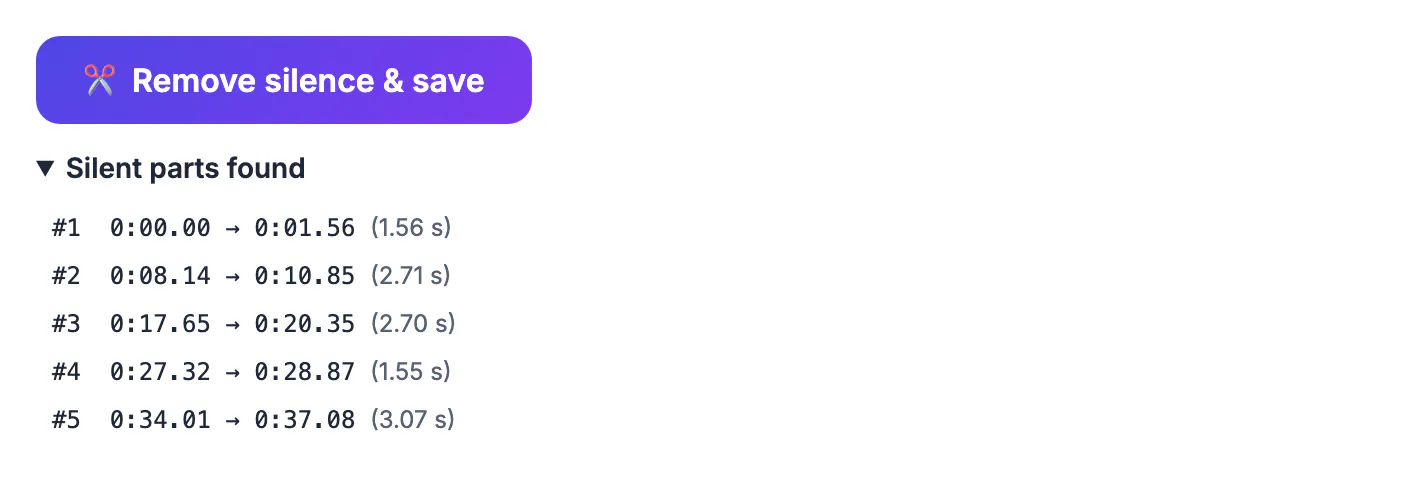
Open Silent parts found to see each cut with its start, end and length, and click one to jump there. Preview result plays the file while skipping the red parts, and Play original lets you compare. The summary line shows how many parts are cut, the time removed and the new length.
When you are happy, pick MP3, M4A (AAC) or WAV (lossless) under Save as and press Remove silence & save. Everything runs in your browser, so the recording is never uploaded.
After cutting, even out loudness with the Volume Booster, and clean steady hiss with the Audio Noise Reduction tool.
When the tool finds too much or too little
- No silence found: the background noise is louder than the threshold. Press Auto, or drag the threshold toward more cuts until the pauses turn red.
- Words are cut off: the threshold is too high or padding too small. Lower the threshold a few dB and raise padding to 0.2 to 0.3 s.
- Breaths remain: breaths are louder than room tone, so they count as sound. That is usually fine; removing them makes speech sound robotic.
- Background music under the voice: music fills the pauses, so there is no silence to find. Remove silence before you add the music bed, not after.
A noisy recording also hides pauses. If a fan or hiss keeps the background above -40 dB, clean the file with a noise reduction tool first, then remove the silence from the cleaner version.
Step-by-step
Common mistakes to avoid
Pro tips
Frequently asked questions
What threshold should I use to remove silence?
Start with the Auto button, which sets the threshold from the recording's own background noise. If quiet pauses are missed, move toward more cuts; if soft words are marked red, move toward fewer cuts.
Will removing silence make speech sound unnatural?
Not if you keep a minimum silence of about a second and 0.15 to 0.25 s of padding. Problems come from cutting every tiny gap with no padding.
Can I remove silence from a video?
Yes. Drop an MP4 and save as MP4; the video is re-encoded so every cut stays in sync. Choose an audio format instead if you only need the sound.
Is my recording uploaded anywhere?
No. Detection, preview and export all run in your browser, so the file stays on your device.
Can I keep the silence at the start and end?
Yes. Untick Also trim silence at the start and end, and only pauses in the middle of the recording are removed.
Let Auto set the threshold, keep about a second of minimum silence and a little padding for natural speech, preview the red cuts, then export. You get a tighter recording in seconds without a single manual edit. Keep the original file until you have listened to the finished version from start to finish.
Related guides
Browse more: all video and audio guides · Remove Silence