How to Reduce Background Hiss and Hum in Audio
To reduce background hiss and hum, first identify which noise you have. Hiss is a steady high-pitched rush, so a high-cut filter plus spectral noise reduction removes it. Hum is a low buzz at the mains frequency, 60 Hz in the US and 50 Hz in Europe, and a hum filter that notches out that frequency and its harmonics removes it without dulling the voice. Rumble from traffic or handling sits even lower and needs a low-cut filter. This explainer covers what causes each noise, which setting targets it, and how to check the result by ear and by numbers.
🎧 Try Audio Noise Reduction now — freeOpen →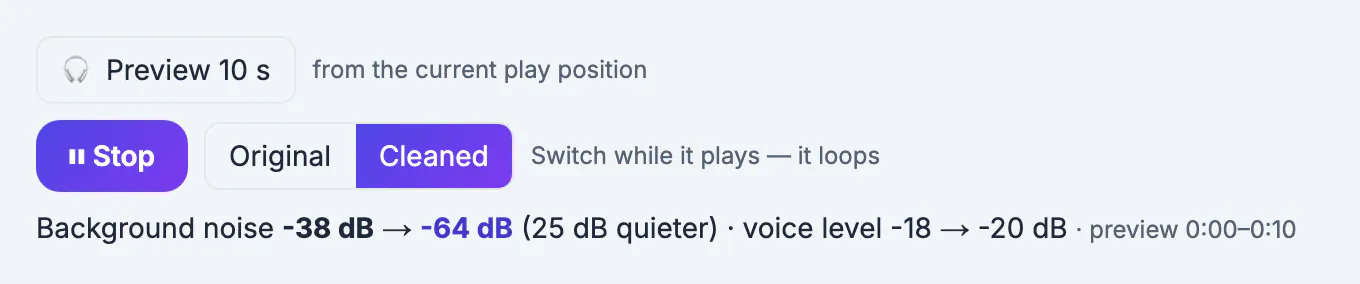
A general noise reduction pass treats every noise the same way, and turning it up to kill a loud hum also eats into the voice. Hiss, hum and rumble each occupy a predictable frequency range, so a targeted filter can remove most of each one while leaving speech, which sits roughly between 100 Hz and 8 kHz, mostly untouched. Knowing which is which lets you use gentle settings and keep a natural sound.
Hiss, hum and rumble: how to tell them apart
- Hiss: a constant shhh, like air from a vent or tape noise. Common causes are cheap microphones, preamps turned up too high and quiet recordings boosted later. It is loudest above about 5 kHz.
- Hum: a low, steady buzz with a pitch. It comes from electrical interference: ground loops, unbalanced cables near power lines, lights on dimmers or a laptop charging while plugged into an audio interface. It sits at 60 Hz (US) or 50 Hz (Europe) plus multiples such as 120 and 180 Hz.
- Rumble: a deep, unpitched thump or roar below about 100 Hz: traffic, air conditioning, footsteps, or a microphone stand being bumped.
- Broadband room noise: fans, computers and fridges spread across many frequencies. That calls for spectral noise reduction rather than a single filter.
Listen with headphones in the quietest pause of the recording. If you can hum along to the noise, it is hum; if it sounds like air, it is hiss.
Which setting fixes which noise
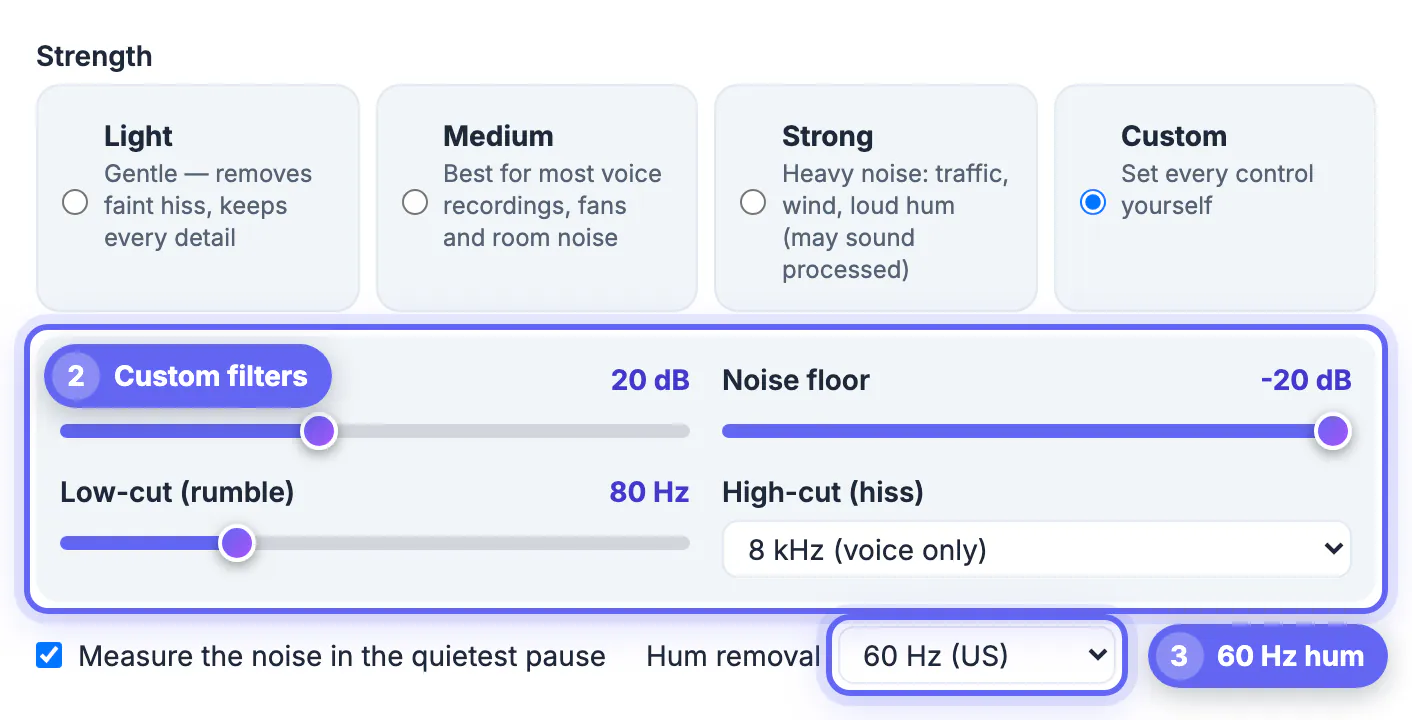
In the GrabCast Audio Noise Reduction tool, choose Custom under Strength to see every control:
- High-cut (hiss): removes everything above the chosen frequency. 12 kHz is gentle, 8 kHz (voice only) removes most hiss from speech, and 5 kHz (phone-like) is a last resort.
- Hum removal: choose 60 Hz (US) or 50 Hz (Europe). The filter removes the base frequency and its first harmonics.
- Low-cut (rumble): removes everything below the set frequency. 80 Hz suits most voices; 100 to 150 Hz helps with heavy traffic rumble.
- Noise reduction and Noise floor: the spectral part that lowers steady broadband noise. More dB of reduction removes more noise but can make the voice watery.
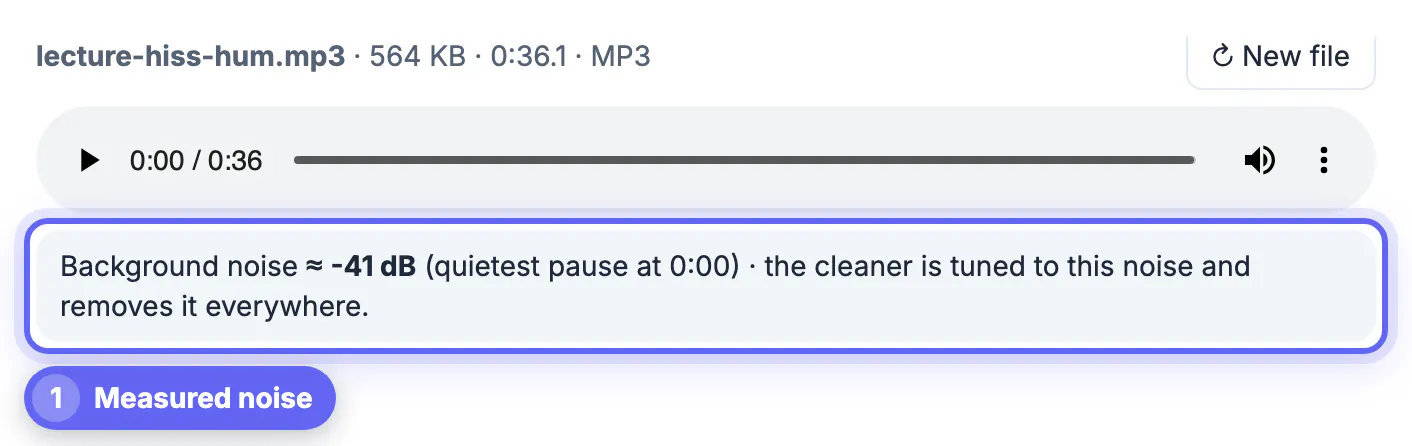
Keep Measure the noise in the quietest pause ticked. The tool finds the quietest stretch, reports the background level, and tunes the cleaner to that noise. In the example, a lecture with added hiss and a 60 Hz buzz measures about -41 dB of background noise.
Check the result by ear and by numbers
Press Preview 10 s to render ten seconds with your settings, then switch between Original and Cleaned while it loops. The line below shows the background noise and voice level before and after. In the screenshot the noise drops from -38 dB to -64 dB, 25 dB quieter, while the voice level only moves from -18 to -20 dB. That is the pattern you want: a large drop in noise and a small change in voice.
If the voice drops by more than a few dB or starts to sound hollow, back off: raise the high-cut, lower the noise reduction, or switch to the Medium preset.
Order matters when you process a file in several tools. Clean hiss and hum first, then remove long pauses, then raise loudness and normalize at the very end. Every volume boost also lifts the remaining noise, so reducing noise early gives the loudness step a cleaner signal. Compress to MP3 only once, as the final export, because each lossy encode adds small artifacts that noise filters can mistake for detail.
Prevent hiss and hum at the source
- Set the microphone gain so speech peaks well below clipping, not so low that you boost it by 20 dB later.
- Unplug the laptop charger while recording through a USB interface; ground loops are a classic source of 60 Hz hum.
- Keep audio cables away from power strips and dimmer switches, and use balanced XLR cables for longer runs.
- Record 2 or 3 seconds of silence at the start so the noise measurement has a clean sample.
Test the setup with the Voice Recorder, and bring a quiet take up with the Volume Booster.
Step-by-step
Common mistakes to avoid
Pro tips
Frequently asked questions
What is the difference between hiss and hum?
Hiss is high-pitched, broadband noise like air or tape noise. Hum is a low tone at the mains frequency, 60 Hz in the US and 50 Hz in Europe, plus its harmonics. They need different filters.
How do I remove a 60 Hz hum from audio?
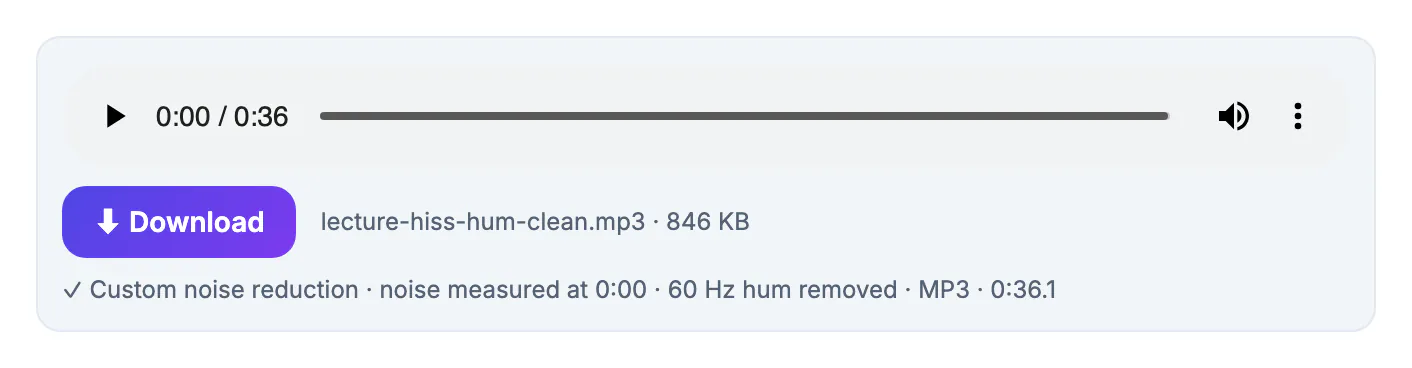
Choose Hum removal 60 Hz (US). The tool cuts 60 Hz and its first harmonics with narrow filters, so the voice keeps its body. Preview to confirm the buzz is gone.
Will removing hiss make my voice sound muffled?
A high-cut at 12 kHz is barely audible on speech. At 8 kHz voices stay clear but lose some air; 5 kHz sounds like a phone call. Pick the highest setting that removes the hiss.
Can I clean the sound of a video?
Yes. Drop an MP4; the picture is kept as it is and only the sound track is cleaned and saved as MP4.
Is the audio uploaded to a server?
No. Analysis, preview and export run in your browser, so the recording stays on your device.
Identify the noise first: hiss needs a high-cut, hum needs a 50 or 60 Hz hum filter, rumble needs a low-cut. Preview 10 seconds, aim for a big drop in noise with a small change in voice level, then save.
Related guides
Browse more: all video and audio guides · Audio Noise Reduction